Office365: Users Synchronized with the Local Active Directory Have Been Deleted
A very interesting situation, which can frighten any administrator on a Friday afternoon: You sign in with your Microsoft Office 365 portal account, and suddenly you see that numerous user accounts are among the deleted users. The O365 portal informs you that these accounts will be completely deleted with all the related data in 30 days.
It means your colleagues won’t be able to use any O365 services with inclusive individual email boxes anymore, and may simply go home. Moreover, you understand that life is full of surprises and the impossible is possible. Why? Every O365 administrator knows that only the users created in the O365 portal (@.onmicrosoft.com) can be deleted in the O365 portal. However, you cannot delete any user in O365 portal if you have selected or filtered this user using the Azure AD Connect or other similar software in your local domain and synchronized him with Office 365. Logically, you can edit, delete or move this user into the OU only in your local domain, which can’t be synchronized with Azure AD. This is the way it works. Dawned inactive settings for synchronized users in the O365 portal display it, and Microsoft informs you about it in its support and TechNet libraries.
That’s the way it is, but only if you are vainly trying to remove users in the O365 portal. Other Microsoft web services don’t have this disadvantage. That’s why when you manage your Microsoft partner portal and limit users’ access to it, which mustn’t own this access under any circumstances, you get a nasty surprise. To achieve the aim, you must delete users in partner portal. At the same time, these users will be deleted in Azure AD and displayed in partner portal as the deleted ones. Oops. From now on, your colleagues can’t use any O365 services and sign in with their O365 portal accounts anymore. The next synchronization of your domain with Microsoft Azure AD is reporting to the AD Connect Tool that users have been deleted in Azure AD and they do not have to be synchronized any more. That’s it; it’s time to call Microsoft.
Quite quickly, the MS support specialist called us and kindly explained that the problem is already well-known, and surprisingly, it was “not a bug, but feature.” Wow, what an awesome feature. Anyway, the support specialist didn’t wish to confirm the fact that this “undocumented opportunity” to delete the synchronized and “read only” users in Azure AD may be considered as a bug. The MS support specialist himself wasn’t 100% sure about subsequent actions and even asked us whether we could somehow recover these poor users in the Microsoft partner portal. Nevertheless, afterwards he found an effective solution. It helped us and that is why we would like to present to you. This solution is nothing else but a universal workaround for situations when you have to reset all previous synchronization parameters and start the AD synchronization like an initial one. The filters will be taken in consideration. In our case, we will use the latest Microsoft development called Azure Active Directory Connector (August 2015)
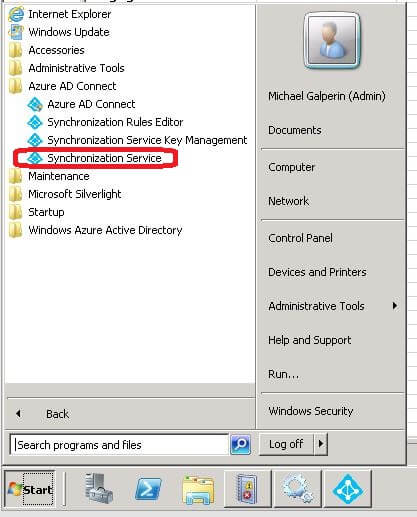
1. Choose Synchronization Service from Azure AD Connect menu item
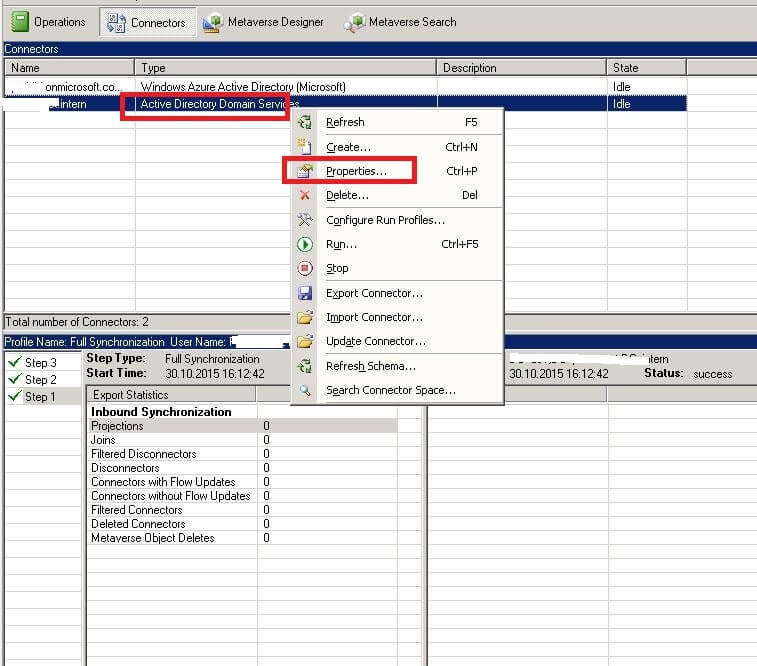
2. Tab Connectors
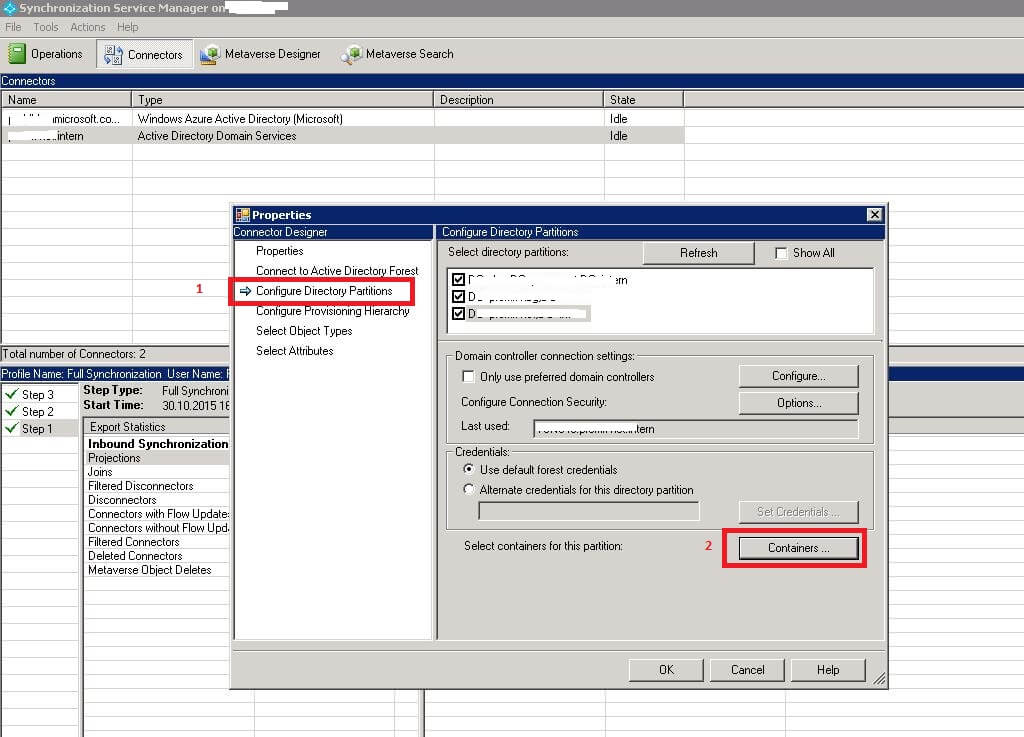
2.1 Choose Connector Active Directory Domain Services. Make sure that our filter settings (in our case, OU) weren’t changed. Of course, if you are not going to completely synchronize all objects of your domain.
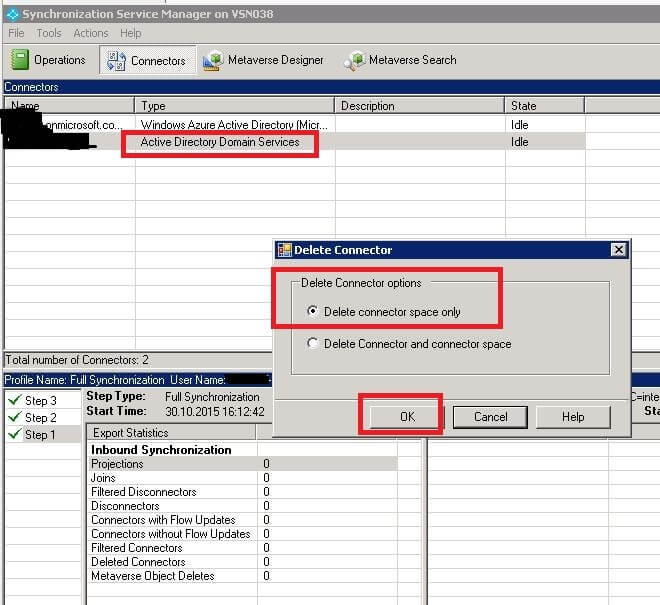
2.2 Connector Active Directory Domain Services -> Delete -> Delete Connector space only (be careful! – You must choose this exact option)
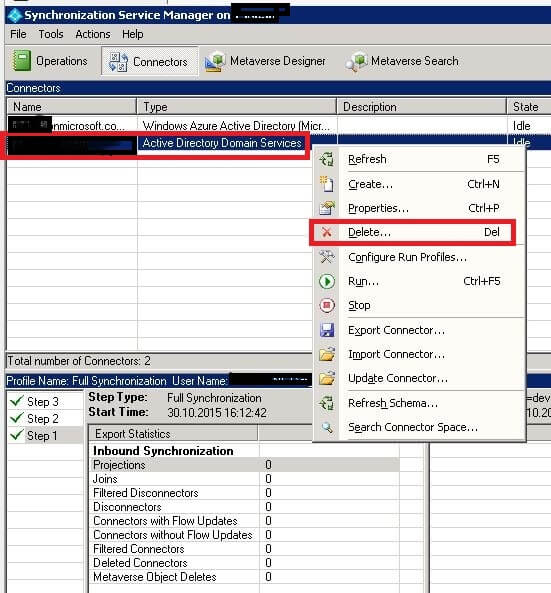
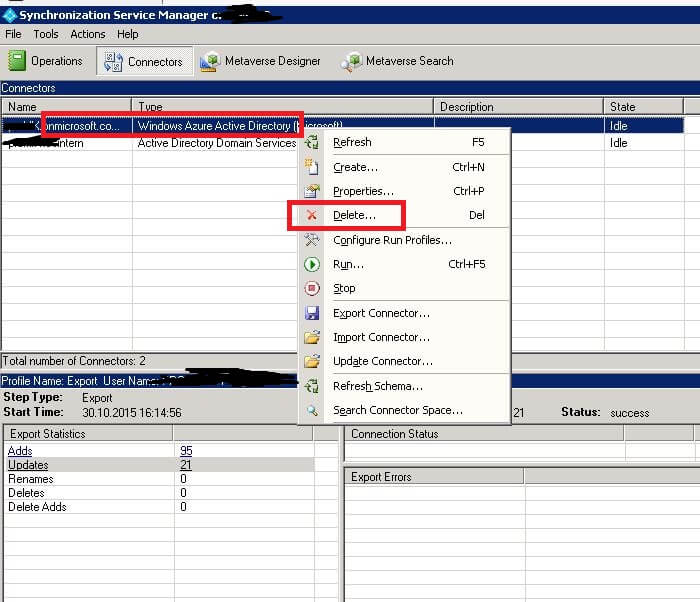
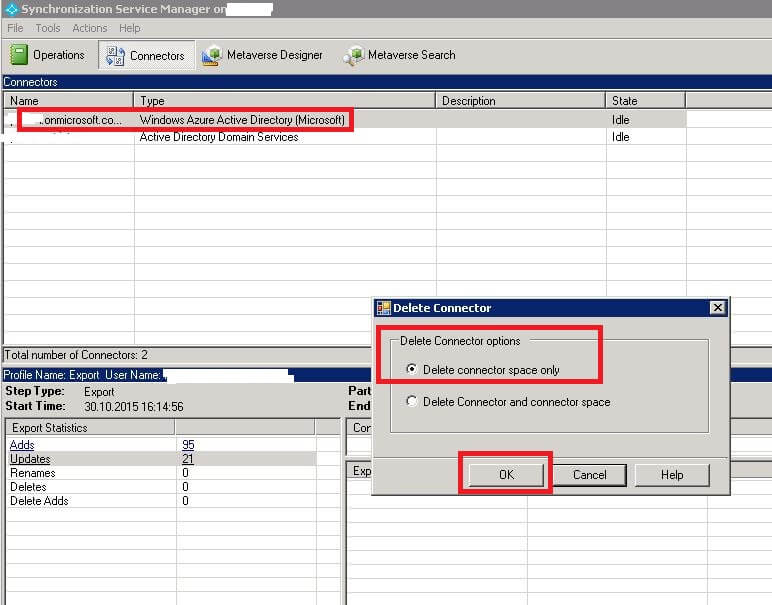
2.3 Choose Connector Windows Azure Active Directory (Microsoft) -> Delete -> Delete Connector space only (be careful! – You must choose this exact option):
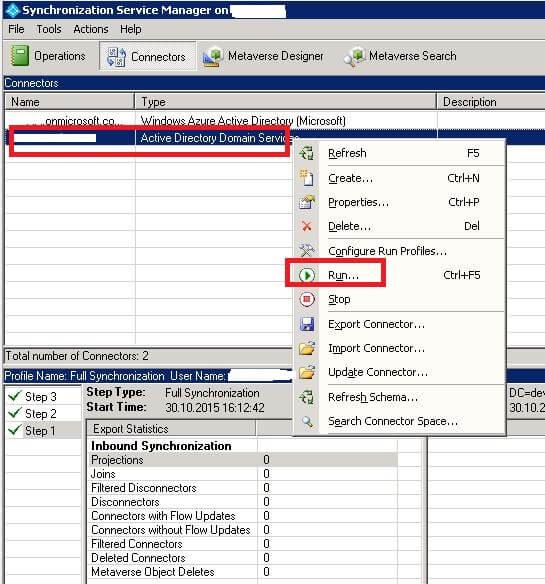
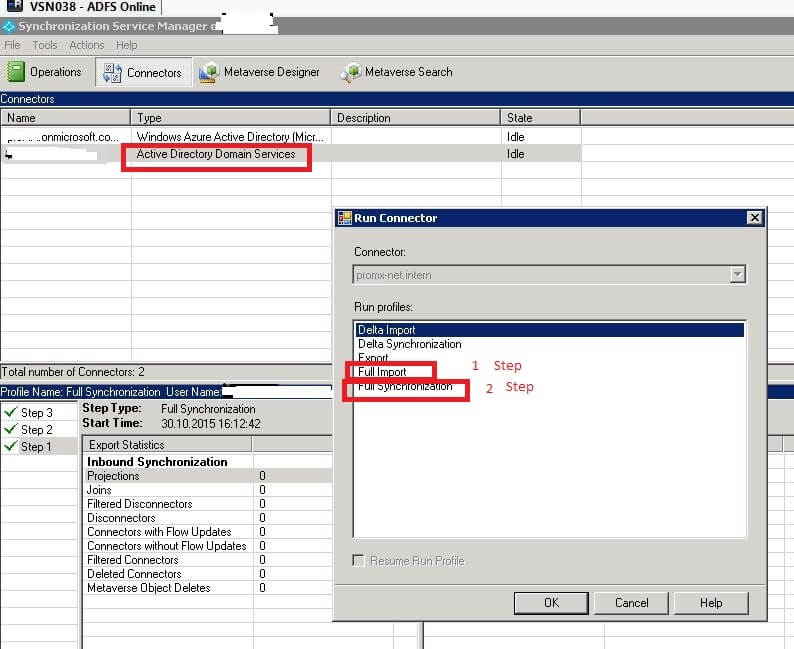
2.4 Go back to Active Directory Domain Services (inner connector). Execute in the order that follows: Run-> Full Import and then Full Synchronization.
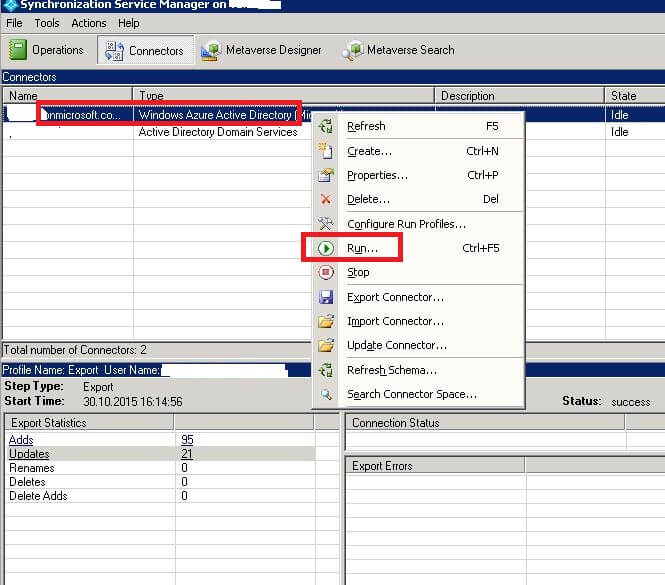
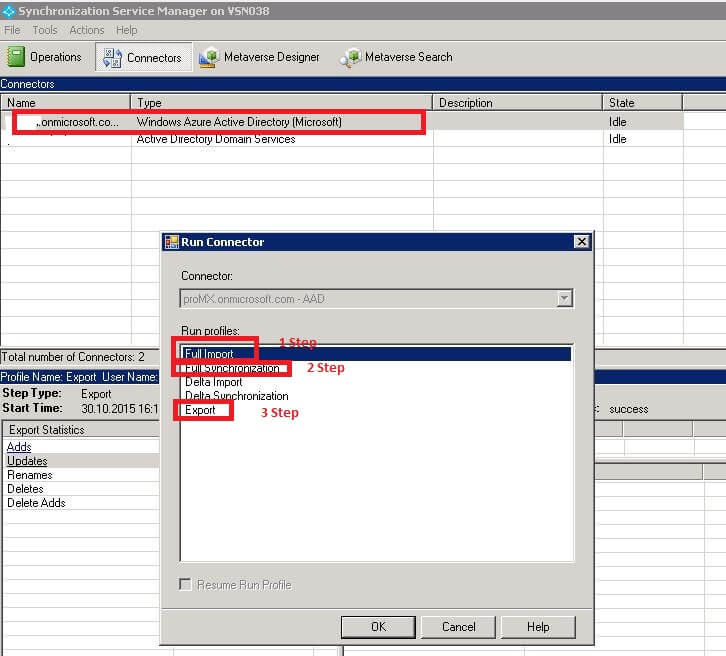
2.5 Choose Windows Azure Active Directory (Microsoft) and similar to the previous paragraph execute in the order that follows: Run -> Full Import, Full Synchronization, Export
2.6 Go to Operations. The sequence of executed synchronizations should look as follows:
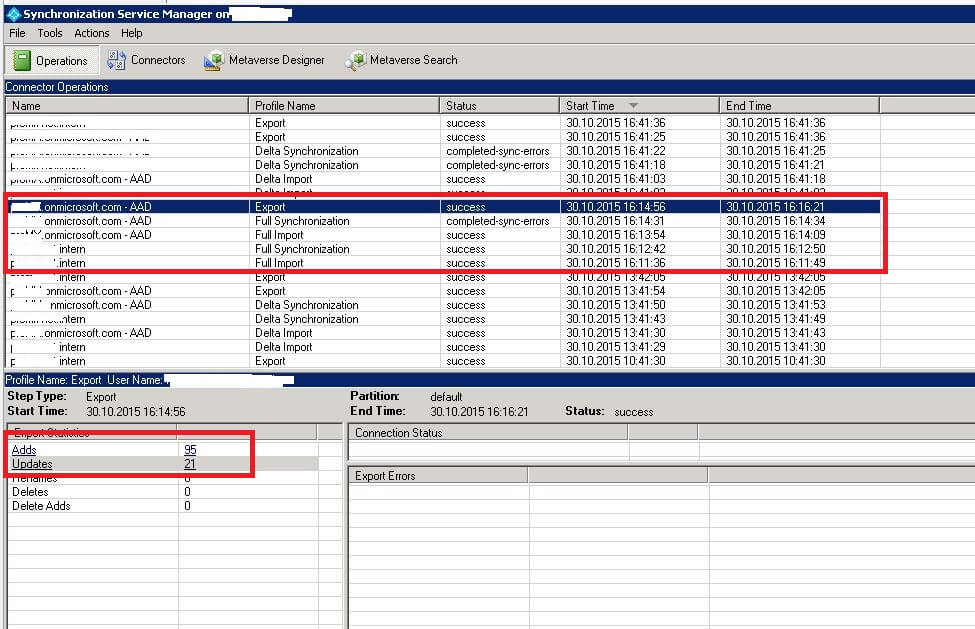
Now, we can check in the O365 portal to see if all of our users have been activated.
Good luck to everyone!


RECENT POST