


How to connect custom web applications to Microsoft Dynamics CRM
If for some reason you need to get a piece of information from Dynamics CRM while developing a website, going through the security steps of Microsoft Dynamics CRM can be quite tricky.
This guide will help you navigate these steps and understand how to connect your web application to your Microsoft Dynamics CRM organization, and get details from it using a function from the CRM Web API called WhoAmI.
You will need basic knowledge of HTML and JavaScript, Microsoft Visual Studio, and a Dynamics CRM organization (can be a trial version).
Step by step: connect custom web apps to the Microsoft Dynamics CRM
- Clone this example project from our public repository and open it.
2. Take a look at the index.html file. Inside the <head> there is one particular script:

This line references a JavaScript library called “ADAL” (Azure Active Directory Authentication Library). This library will enable your web app to authenticate and obtain tokens for securing API calls.
3. Let’s take a look at the following JavaScript code:

These variables will have to be changed for a successful authentication. You will get these values when you register your web app on Azure.
4. To register your app, go to portal.azure.com and log in using your Microsoft Dynamics CRM credentials.
5. In the menu bar, click on Azure Active Directory and go to App registrations. There click the + New application registration.
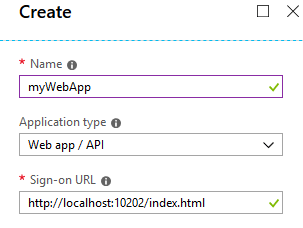
6. Choose any name for your new application registration (this is only a reference for you). Then, for Application type select Web app/ API and for Sign-on URL use: http://localhost:10202/index.html.
Finally, click Create.
7. Copy the Application ID and use it to replace the content of the variable clientId from step #3.
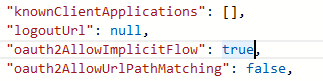
8. Back in the Azure portal, click manifest and change the value of oauth2AllowImplicitFlow from “false” to “true” and click Save.
9. Finally, you need to give permission in the Active Directory to connect your app to Dynamics CRM.
a. In the Settings of your new app, go to Required permissions and click + Add, then Select an API and choose Dynamics CRM Online. For Select Permission in the next step, choose Delegate Permission and click Done.
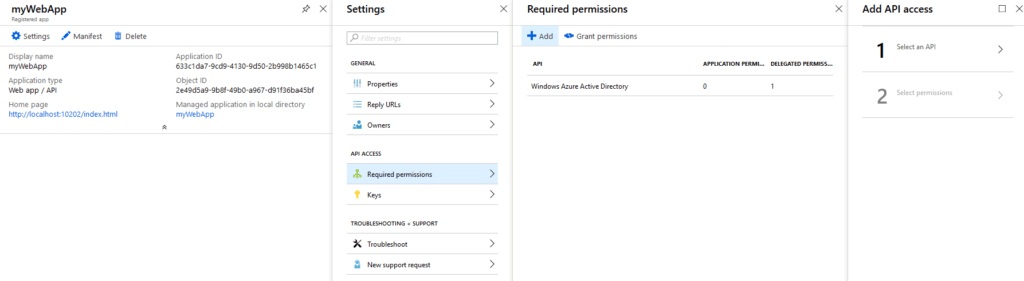
b. Then go to Required permissions, select the API of Dynamics CRM and click Grant permission.
10. If you now take another look at the code, you’ll see that there are still two variables that need to be changed: tenant and organizationURI. These variables ate necessary to connect your web app to Azure.
a. tenant: This is your Azure AD ID. To get your tenant ID, go to Azure and select Azure Active Directory (where you registered your app earlier) and look for Properties. There you will find the Directory ID with an alphanumeric code. Copy it and use it to replace the content of the variable tenant.
b. organizationURI: Replace the content of this variable with your CRM organization’s URL.
Test the connection
Run the project and it will open your default browser. Click the Log In button and give your organization’s credentials. You will see the name of the user who is logged in (i. e. your user name) . Click the button Get Who Am I and you will see your user ID.
Replace the WhoAmI function
Take a look at this part of the JavaScript code:
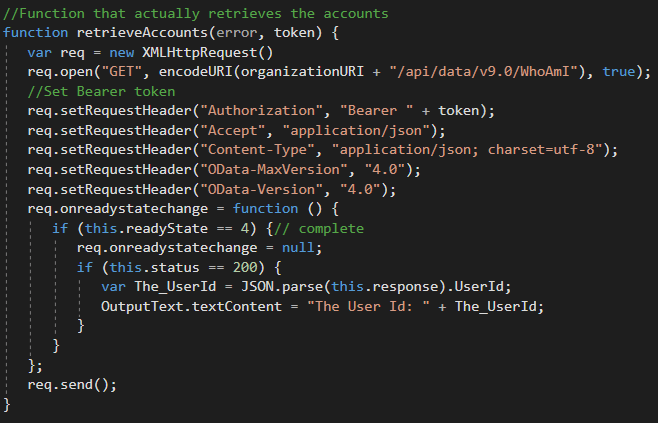
You can see that the variable organizationURI is complemented with /api/data/v9.0/WhoAmI. This is what the code has called the function WhoAmI of the Dynamics Web API. You can replace this with Web API Query data or other functions.
Remember: OrganizationURI, tenant and clientID is information only for you to prevent external queries or changes. Be careful how you store it in your web app!
FAQ
How do I add apps to Dynamics 365?
You can add apps to the Dynamics 365 CRM with the help of editing a function from the CRM Web API called WhoAmI. In our article we show you how to do it step by step.
Does Dynamics 365 have an API?
Yes, Dynamics 365 has the Dynamics Web API.


RECENT POST
OUR EVENTS

